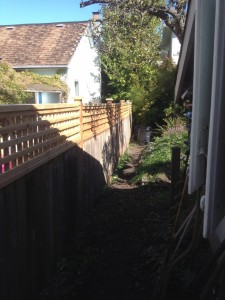
 Well, every 20 years or so it’s probably time to replace a faulty wooden fence – you know the kind, the sort of fences that have been propped up by angled-support stilts, and really wobble in a heavy storm.
Summer 2014 is the year for our fence-replacement project, and is a backyard project that has recently been completed.
This project has been a long time in coming, and the turning point to carry this one into the execution phase was really the drafting of the plan. Lance spent some time coming up with a nice plan for the fence, and laid it down on paper for us to go over. The plan featured a way to recycle a bunch of the existing materials into the new fence, so that was a big win. Not only a smart design-move, but cost-effective as well. Speaking of cost, we worked a deal with the neighbour on this project:
- we do the labour
- he buys the lumber
The project unfolded over several weekends in August and September this summer, and we had many sunny days out in the yard to work on this one. The post-holes are all about 2′ deep, and filled with Post-Haste quick-set concrete, and some large hunks of concrete aggregate that have been laying around the yard for a while.
So, basically what we have is a 60′ fence with:
- 9 new cedar fence posts
- many new cedar 2x4s
- recycled cedar planks from old fence (rot removed!)
- new 2×2 cedar lattice panels, cut to size

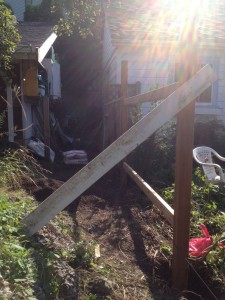
What you can see in the 2nd picture here is the design approach – 8-foot sections with 2×4 cedar beams used to hold the recycled cedar planks from the old fence. The old fence had the planks touching the ground, so we chopped the rot off those bad-boys and nailed them in. 2.5″ framing nails did the job there. Oh, and the metal 2×4 braces make it super-easy to support the 2×4 beams on the fence posts.
The post-hole digging was fairly easy, going down into soil and a bit of clay. Only 1 of the 9 holes presented a real back-breaker of a problem, where I crashed right into some major tree roots. What to do ? Do you move the hole, and get flexible with the sizing of the rest of the sections, or do you wiggle around in the ground a little bit to squeeze the post in where you wanted it ? In this case, I had to make a tough-decsion, and I didn’t do the tree a favour – I hacked through part of the root so I could get the post in the “right place”. argh.
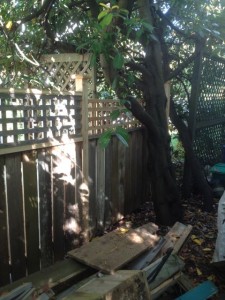
 Had to get a little creative in the last mile here, as the fence-line basically collides with a tree on the property line. So, I stayed true to the fence-line, in the interests of keeping it straight, and ducked the lattice panel underneath one of the tree limbs. I also had a cedar plank with a chunk muscled out of it that would fit nicely around one of the lower limbs that stretches out into the neighbour’s yard. I was topping the lattice panel sections with a 2×4 cedar beam, but couldn’t quite squeeze a 2×4 into this section, so used a 2×2 cedar length instead.
Many trips to Castle Lumber over on Cook St. for the supplies on this project.
Related posts
1 Comment
Comments are closed.
Blog Archives
- July 2025
- January 2025
- December 2024
- November 2024
- June 2024
- December 2023
- October 2023
- August 2023
- May 2023
- January 2023
- March 2022
- December 2021
- November 2021
- October 2021
- September 2021
- August 2021
- June 2021
- May 2021
- April 2021
- August 2020
- July 2020
- June 2020
- July 2019
- June 2019
- February 2018
- January 2018
- August 2017
- July 2017
- June 2017
- January 2017
- December 2016
- September 2016
- June 2016
- October 2014
- January 2014
- June 2013
- April 2013
- January 2013
- August 2012
- July 2012
- June 2012
- May 2012
- April 2012
- March 2012
- August 2007

Wow, cool project – way to recycle that lumber!