Seasonally speaking, this is the time of year for enjoying panettone. You might be able to find a few panettone left at your local bakery, or grocery outlet – indeed I saw a few left at the store yesterday. They hadn’t been picked up before the holiday, so were sitting there, waiting for purchase, or a trip to the mark-down table.
Prices vary on store-bought, from under $10, to over $20 – so your mileage will vary there. Panettone can also be made in your home-kitchen, and in this blog post, I’ll show you how you can make a fine panettone at home.
This year, I made 4 panettone in the home-kitchen on Dec 20-21 – 3 went out as gifts, and 1 stayed home for us to enjoy on Christmas morning. I selected the recipe from Peter Reinhart’s book The Bread Baker’s Apprentice for this round. The formula results in 2 panettone loaves, and I usually like to do 2 batches at once to yield the 4-pack.
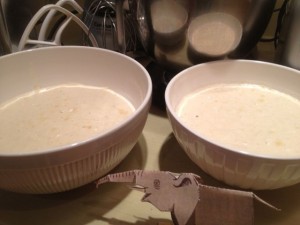 The activity is spread out over 2 days, so does take some time, and a bit of organization in the home-bakery. This recipe also calls for a wild-yeast sourdough starter, which I do have handy in the fridge. There are other recipes out there that don’t call for a barm on standby, so look around if you don’t happen to keep a sourdough starter alive in your kitchen. I keep 2 bowls of wild-yeast starter going at all times here, 1 of them since 2009, so if you need some let me know. Pictured here are the 2 batches of wild-yeast starter mixed with milk and some flour. The sponges get assembled the day before the dough is mixed, so here they are. I mixed these up in the evening, and let them sit out overnight.
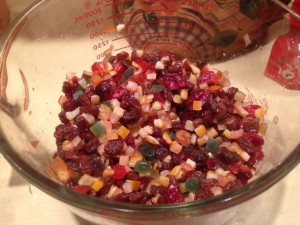 While the sponges are doing their thing, you can also prepare the candied fruit mixture, spiked with your preferred seasonal liquor. This year, I found some pre-packaged glace mix at the store, added raisins, vanilla, and spiked with whiskey. In past years I’ve mixed various types of candied fruit with dried fruit and spiked with rum, so various combinations will work here. Having some orange or lemon extract is also a nice touch, but I didn’t have those on hand this year. No razz-cherries this year, either. I’m usually a little more-prepared for this particular baking event, but it kind of crept up on me this year, so I did the best I could with what I had available. C:-)
So, with sponge bubbling and fruit spiking, then go to bed, and return to the kitchen the next morning.
Make sure you’ve got all your ingredients ready the next morning, as you’ll need to plan for the various stages in the dough-making phase. This year, I got into the kitchen a little late, around 11:30 AM, but still had enough time in the day to complete.
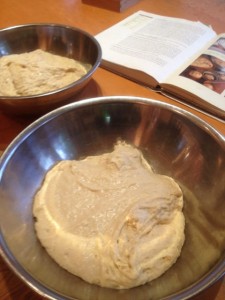 You’re going to start with making 2 batches of dough, shown here. You’ll need flour, sugar, salt, commercial yeast, the sponge, 1 egg, and an egg yolk. This dough will need some time to develop the gluten, so that’s what is happening here.
I used 2 varieties of organic flour on-hand in the kitchen pantry for this dough, an organic unbleached white flour (14% protein) and a red-fife sifted wheat.
The formula calls for the wild-yeast to be spiked with commercial yeast, and I stuck with that plan – although didn’t actually proof the commercial yeast, so not sure if it had legs before I used it.
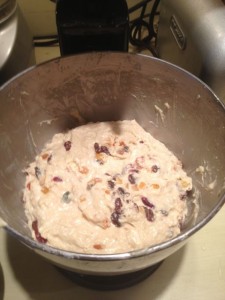
Once the dough has had a little time to proof (at least 20 mins), time arrives to mix in the spiked fruit, and some butter. The whisky did the job on this batch, creating quite a nice batch of fragrant, soaked fruit. Mmmmmm! This dough can be mixed by hand, or in a mixer. I’ve got the KitchenAid stand mixer here, so that really helps accelerate the bread-making process around here. However, this dough hits the capacity of the mixer, and needs to be carefully tended while making rounds in the bowl. This year I didn’t lose too much of it as it crawls up past the top of the dough hook into the axle housing of the mixer.
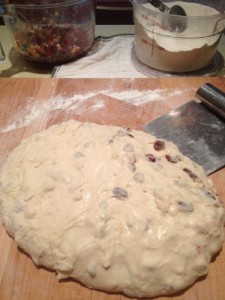 So, here is the mixed dough, on the right, after a round in the mixer, and then some kneading by hand. It’s helpful to do a bit of kneading by hand so you can get the feel for how far along the dough has progressed, and transitioned out of sticky, and into tacky.
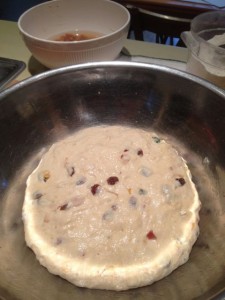 On the left here, you can see that there is a bowl of almonds soaking in the background. I picked up organic whole almonds for this batch, and needed to blanch them before slicing them up and mixing them into the dough.
Once the almonds got mixed in, then the dough needs to sit out and rise at room temperature for a couple of hours, to increase in volume by approx. 1.5 times. During this time, go for a coffee, or run an errand or something. If needed, make sure pets will not devour the dough, and remind young children not to squish or slap the dough around, as it needs to rise undisturbed. This year, I went downtown to tackle some last-minute shopping while the dough was rising.
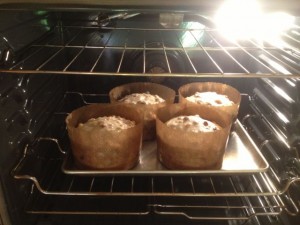
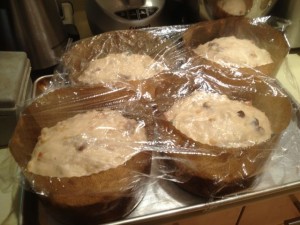 Once the dough has risen, it’s time to divide, shape, and set up in the large size paper panettone baking sleeves. This year, I had 10 sleeves on hand which is great, so no panic there. I divided the dough by eye-balling it, then fine-tuned with a kitchen-scale to get an even distribution for the 4 loaves. Shape by rounding into boules, and then put into the prepared baking papers. Cover, and leave out to rise at room temperature for another 2 hours. The photo shows that these loaves have risen nearly to the top edge of the baking papers, and at this point I put them into the oven – at 325 degrees, for up to 90 minutes.
As you can see, the kitchen activity is quite spread out, so keep that in mind for planning purposes. This year, the loaves came out of the oven well before midnight, so that was nice – but if you start too late in the day, you can easily wind up spending a late night in the kitchen. You’re heading for an internal temperature of 185 degrees on these, so keep a close eye on that past the 60 minute mark. This year, I went just a touch long on the baking, so overshot 185 degrees – a valid excuse I have is that we got a new range this year, and I’m still getting used to baking with it ? c:-)
While I was out today, I called around to my usual suppliers in order to buy some more large-size panettone baking sleeves, but all advised that they were low on stock in the large size, and to try again next year. Bond Bond’s had some small-size panettone papers, so I bought some of those – thanks! I usually re-stock at this time of year while the local bakeries have their supplies at hand.
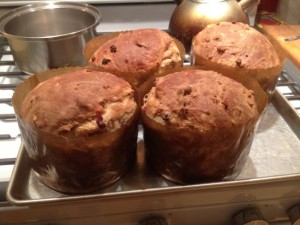
Anyhow, the panettone turned out nicely this year, and I’m almost ready to do 1 more round – will have to keep that wild yeast fed, and set aside a Friday night, and all-day Saturday to tackle this task…
Related posts
Blog Archives
- July 2025
- January 2025
- December 2024
- November 2024
- June 2024
- December 2023
- October 2023
- August 2023
- May 2023
- January 2023
- March 2022
- December 2021
- November 2021
- October 2021
- September 2021
- August 2021
- June 2021
- May 2021
- April 2021
- August 2020
- July 2020
- June 2020
- July 2019
- June 2019
- February 2018
- January 2018
- August 2017
- July 2017
- June 2017
- January 2017
- December 2016
- September 2016
- June 2016
- October 2014
- January 2014
- June 2013
- April 2013
- January 2013
- August 2012
- July 2012
- June 2012
- May 2012
- April 2012
- March 2012
- August 2007

